Running a pop-up on your own can be expensive. Renting a prime retail space in downtown Toronto or Vancouver for even a few days adds up fast when a single brand is footing the bill. But what if you split that cost with three or four other brands, each bringing a different audience to the same location?
That is the idea behind multi-vendor pop-up shops, and it is quickly becoming one of the smartest ways for Canadian small businesses to break into physical retail without the risk of a long-term lease. Whether you sell handmade candles, streetwear, specialty sauces, or skincare, a shared pop-up lets you test the waters in a real storefront while keeping costs manageable.
This guide covers everything you need to plan, launch, and run a successful multi-vendor pop-up in Canada. From choosing co-vendors and finding the right space to handling permits, marketing, and measuring results, we will walk through it step by step.
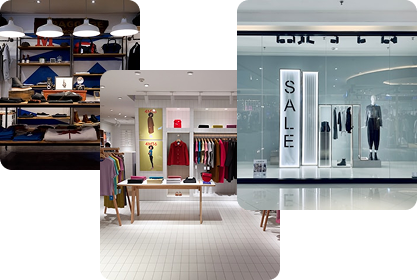
What Is a Multi-Vendor Pop-Up Shop?
A multi-vendor pop-up is a temporary retail space shared by two or more brands. Think of it as a curated mini-market inside a storefront, gallery, or event space. Each vendor gets their own section of the floor, but the collective draws more foot traffic than any single brand could alone.
This format works well across categories. A pop-up in Toronto’s Queen West neighbourhood might pair a local jewellery designer with an indie skincare brand and a specialty chocolate maker. The mix creates a browsing experience that feels more like discovery than shopping, which is exactly what today’s consumers are after.
Multi-vendor setups differ from traditional pop-ups in a few practical ways. Costs like rent, insurance, and marketing get divided among participants. Foot traffic tends to be higher because each brand brings its own audience. And the variety keeps shoppers engaged longer, which typically translates to more sales per visit.
Why the Multi-Vendor Model Works Well in Canada Right Now
The Canadian retail landscape has shifted dramatically over the past few years. Commercial vacancy rates in cities like Toronto, Vancouver, and Montreal have created a surplus of short-term rental opportunities. For landlords sitting on empty storefronts, pop-ups offer a way to generate income. For brands, those same vacancies mean more negotiating power and better locations than were available even five years ago.
At the same time, Canadian consumers are showing renewed interest in physical shopping. Brick-and-mortar still accounts for roughly 80 to 85 percent of retail sales in Canada, according to retail analysts. But the reasons people visit stores have changed. Shoppers want experiences, not just transactions. They want to discover something new, meet the people behind a product, and feel like their visit was worth the trip.
Pop-ups built around multiple vendors tap directly into that shift. A single-brand storefront can feel predictable. A curated group of three to five brands creates a sense of occasion that is difficult to replicate online. Add in the scarcity factor (it is only open for a weekend, or a week) and you get a built-in sense of urgency that drives both foot traffic and purchases.
The economics make sense too. The global pop-up retail market hit an estimated $80 billion in recent years, and continues to grow. In Canada specifically, founders and new businesses are leaning into pop-ups and store-in-store concepts because the actual investment required is significantly lower than a permanent location. As one retail strategist put it, the model is simple: pop up, move the inventory, pop down. Capital stays mobile and risk stays low.
Step 1: Define Your Goals Before You Do Anything Else
Before you start scouting spaces or reaching out to other vendors, get clear on what you want this pop-up to accomplish. That clarity will shape every decision that follows.
Common goals for multi-vendor pop-ups include testing a new product line in a physical setting, building brand awareness in a new city or neighbourhood, generating direct sales revenue, collecting customer feedback and email signups, and creating content for social media and future marketing.
Your goal will affect the type of space you look for, the vendors you invite, how long you stay open, and how you measure success. A pop-up focused on brand awareness might prioritize a high-traffic location with heavy social media promotion. A sales-focused pop-up might choose a slightly cheaper space but invest more in inventory and point-of-sale setup.
Write your primary goal down. Share it with every vendor in the group so everyone is aligned from day one.
Step 2: Find the Right Co-Vendors
The vendors you partner with can make or break the experience. The best multi-vendor pop-ups feel curated, not random. You want brands that complement yours without directly competing.
Here is what to look for in a co-vendor: products that serve a similar audience but fill a different need, a comparable quality level and price range, an active social media following (even a small one), reliability and professionalism, and a willingness to split costs and share promotional duties fairly.
For example, if you sell artisan coffee, great co-vendors might include a local ceramics studio (mugs), a bakery (pastries), and a stationery brand (journals). The customer who walks in for coffee is very likely to browse all four.
Where to find co-vendors? Start with your existing network. Check local maker markets, Instagram hashtags like #MadeInCanada or #TorontoMakers, community business groups, and platforms built specifically for connecting pop-up brands with spaces and other vendors.
Matching platforms like Popup2gether use algorithms to pair complementary vendors and match them with suitable retail spaces. This kind of tool can save weeks of outreach, especially if you are launching your first pop-up and do not have a wide network yet.
Step 3: Choose Your Location and Format
Location is everything for a pop-up. You need a space where your target customer already spends time, or a space interesting enough to pull them in.
Types of Spaces That Work for Multi-Vendor Pop-Ups
Vacant retail storefronts are the classic option. Landlords in Canadian cities are increasingly open to short-term rentals, especially in areas with higher vacancy rates. Gallery spaces and creative studios work well for brands with a design or art angle. Community centres and event halls are suitable for larger markets with more vendors. Shared retail spaces like Stackt Market in Toronto are already built for this format. Even restaurants and cafes that are closed on certain days sometimes rent out their space for weekend pop-ups.
Factors to Consider When Choosing a Space
Foot traffic matters, but so does the right kind of foot traffic. A busy intersection near a transit stop will get a lot of people walking by, but are they your people? Think about the neighbourhood demographics, nearby stores, and the time of day that area is busiest.
Also consider practical details: Does the space have electricity and wifi? Is there enough room for each vendor to set up comfortably? Are there washroom facilities? Is there adequate storage for inventory? What about accessibility?
If you are still figuring out which Canadian neighbourhoods are best suited for your products, this data-driven guide to pop-up locations in Canada breaks down foot traffic patterns and customer demographics by city.
Step 4: Handle the Legal and Regulatory Requirements
This is the part nobody finds exciting, but skipping it can shut you down before you even open. Canada does not have a single federal pop-up shop licence. Instead, regulations are split across three levels: federal, provincial, and municipal.
Business Registration
Every vendor participating in the pop-up needs a registered business. If you are already selling online or at markets, you likely have this covered. If not, you will need to register your business name with your province (Service Ontario for Ontario-based businesses, for example) and get a Business Number from the Canada Revenue Agency.
GST/HST Registration
If your annual revenue exceeds $30,000, you are required to register for GST/HST and charge it on sales. Even if you are under that threshold, you may want to register voluntarily so you can claim input tax credits on business expenses.
Municipal Permits and Licences
This is where it gets location-specific. Some municipalities require a temporary business licence for pop-up operations. In Toronto, for instance, all businesses need proper licences and permits before opening. If you are selling food, you will need food handler certification and a health inspection. If you are putting up exterior signage, there may be a separate signage permit.
The Government of Canada offers a free tool called BizPal that helps you identify which federal, provincial, and municipal permits may apply to your business based on your location and activities. It is a good starting point, though you should always follow up directly with your local municipality.
Insurance
Liability insurance is non-negotiable. Your landlord will almost certainly require it, and you need it to protect yourself. In Canada, finding short-term insurance for pop-ups can be tricky since many insurers prefer annual policies. Look for a broker experienced with temporary retail. Some pop-up organizers have found success by adding a rider to an existing business insurance policy, which can be cheaper than a standalone short-term policy.
Lease or Licence Agreement
For short-term pop-ups, you will likely sign a licence agreement rather than a full commercial lease. Licence agreements are simpler and cover the basics: permitted use of the space, duration, payment terms, and any restrictions on what you can sell or how you can modify the space. Have a lawyer review the agreement, especially if it is your first time.
Platforms like Popup Together include automated document preparation tools that help vendors and landlords get the paperwork sorted faster, which can be a real time-saver when you are coordinating multiple vendors.
Step 5: Budget Realistically
One of the biggest advantages of multi-vendor pop-ups is shared costs. But you still need a clear budget. Here are the main expense categories to plan for.
Shared Costs (Split Among Vendors)
Rent is usually the largest line item. Pricing varies wildly by city and neighbourhood. A small storefront in downtown Toronto might run $500 to $2,000 per day, while a space in a smaller city could be significantly less. Insurance for the space, basic marketing (signage, flyers, shared social media ads), and any shared equipment like a sound system or lighting are also typically split.
Individual Costs (Each Vendor Covers Their Own)
Your display setup, including tables, racks, shelving, and signage for your brand. A point-of-sale system (Square, Shopify POS, or similar) for accepting payments. Your inventory and any packaging materials. Staff, if you need someone to cover shifts. Transportation to get everything to and from the venue.
Budget Tips
Build in a 15 to 20 percent buffer for unexpected expenses. Get quotes from at least two or three spaces before committing. If you are doing this for the first time, keep it small. A three-day pop-up with three vendors is a great starting point to test the format without overextending.
Step 6: Design the Space for Flow and Discovery
Layout matters more than people realize. In a multi-vendor pop-up, you want shoppers to naturally move through the entire space, not cluster at one table and leave.
Place the vendor with the most visual appeal or the largest draw near the entrance to pull people inside. Create a natural path through the space that passes every vendor. Give each brand enough room to display products properly without feeling cramped. Use consistent signage and a cohesive colour palette to make the space feel intentional rather than thrown together.
Consider adding a communal element. A coffee station, a DJ, or a photo backdrop can serve as an anchor that keeps people in the space longer. The longer they stay, the more they buy.
Step 7: Build a Shared Marketing Plan
Marketing is where multi-vendor pop-ups have a huge built-in advantage. Every vendor has their own audience, and when you pool those audiences, the reach multiplies.
Before the Pop-Up
Start promoting at least three to four weeks out. Each vendor should post about the event on their own social media channels. Create a shared hashtag that everyone uses. Build a simple landing page or event page with the date, location, and a preview of what each brand will offer. Collect email signups from each vendor’s list for a combined announcement.
If your budget allows, run a small paid ad campaign on Instagram or Facebook targeting people in the pop-up’s neighbourhood who follow similar brands.
During the Pop-Up
Post live content throughout the day. Stories, reels, behind-the-scenes clips. Encourage visitors to share their experience and tag the event hashtag. Offer an incentive for social shares, like a small discount or entry into a giveaway.
After the Pop-Up
Follow up with every customer who gave you their email. Share a recap on social media. If you took photos (and you should), use them in future marketing. Send a thank-you to your co-vendors and discuss what worked and what you would change.
For a deeper breakdown of pop-up marketing tactics, including pre-launch, live-event, and post-event strategies, check out this guide to pop-up shop marketing.
Step 8: Set Up Your Payment and Inventory Systems
Accepting payments should be frictionless. Most shoppers in Canada expect to tap their card or phone. Cash-only setups will cost you sales.
Each vendor should have their own POS system. Square and Shopify POS are the most popular choices for Canadian pop-up vendors because they are easy to set up, accept contactless payments, and track sales in real time. Make sure your POS system works offline in case the wifi is unreliable.
For inventory, bring enough product to cover your projected sales but do not overstock. If you have historical data from online sales or past markets, use it. If this is your first event, a conservative approach is smarter. Running out of a popular item creates urgency. Hauling unsold boxes back to your car does not.
Step 9: Run the Event Like a Professional
Once the doors open, execution is everything.
Arrive early to set up and troubleshoot. Make sure every vendor’s display is ready before the first customer walks in. Have someone designated as the point person for the day to handle any issues that come up, from a blown fuse to a confused delivery driver.
Greet every person who walks in. This sounds basic, but a warm welcome sets the tone. In a multi-vendor space, it also signals that this is one unified experience, not a collection of separate stalls competing for attention.
Track foot traffic and sales throughout the day. Even a simple tally of how many people enter the space, broken down by hour, gives you data to work with later. Some platforms provide real-time analytics dashboards that connect your POS data with foot traffic patterns, giving each vendor insights into peak hours, conversion rates, and which product categories performed best.
Step 10: Measure Results and Plan Your Next Move
After the pop-up wraps, sit down with your co-vendors and review the numbers.
Key Metrics to Track
Total revenue per vendor, total foot traffic and conversion rate (what percentage of visitors made a purchase), average transaction value, email signups or social media followers gained, and total cost versus total revenue (your actual ROI).
Qualitative Feedback
Beyond the numbers, talk to your co-vendors about what customers said. Which products got the most attention? Were there common requests you could not fulfil? Did the location work, or would a different neighbourhood have been better?
Use all of this to decide your next step. Maybe you repeat the same format in a different city. Maybe you do a longer run. Maybe you bring in different vendors. The data from your first pop-up is the foundation for a smarter second one.
Common Mistakes to Avoid
Choosing Vendors Based on Friendship Instead of Fit
Your best friend’s candle brand might be great, but if it does not complement the other vendors or appeal to your shared target customer, it does not belong in this pop-up. Keep curation decisions based on strategy, not sentiment.
Underestimating Setup Time
Multi-vendor setups take longer than solo ones. Coordinating three to five brands in one space, each with their own displays and needs, requires extra time. Plan to arrive at least two to three hours before opening.
Skipping the Written Agreement Between Vendors
Even among friends, put the terms in writing. Who pays what share of rent? Who handles insurance? What happens if a vendor cancels last minute? A simple one-page agreement prevents most disputes.
Ignoring Post-Event Follow-Up
The pop-up is not the end. It is the start of a customer relationship. If you collected emails or social handles, use them. If you do not follow up within a week, you have wasted one of the most valuable outcomes of the entire event.
How Technology Is Changing the Multi-Vendor Pop-Up Experience
The pop-up space in Canada is getting more tech-driven, and that is a good thing for vendors who want to be strategic rather than just hopeful.
Platforms like Popup Together are building tools specifically for the multi-vendor pop-up model. Their AI-powered matching system pairs complementary brands and connects them with suitable retail spaces, taking the guesswork out of two of the hardest parts of the process. The platform also provides in-store analytics (think foot traffic heatmaps and sales performance data) and turnkey setup support including contract preparation and marketing tools.
This kind of infrastructure did not exist a few years ago. It lowers the barrier to entry for small brands that want to try physical retail but do not have the time or resources to manage every detail themselves.
Is a Multi-Vendor Pop-Up Right for Your Brand?
Not every brand is a fit for this format, and that is fine. Multi-vendor pop-ups work best when your product benefits from being seen in person, when you have an audience you want to grow in a specific geographic area, when your budget does not support a solo storefront, and when you want to test a physical retail concept before committing to something permanent.
If you check two or more of those boxes, a multi-vendor pop-up is worth trying. The costs are shared, the risk is low, and the learning curve is short. Even if your first event does not break even financially, the customer data, brand exposure, and operational experience you gain are worth the investment.